Noodles and More
Posted in Production by andy 50 shots to go, don’t panic.
As the final deadline is getting closer and closer (more exciting, riveting, mind-warping news about that soon!) everything seems to be moving at light speed. almost the entire movie is animated and ready for further reviews and improvements, the environments are completed, final scenes set up, lit and composited to shape what’s going to be the first Open Movie of the Blender Institute: Big Buck Bunny!
*ehem* now that the PR-talk part of my brain is satisfied…
An essential part of the “finals”-process is the blender node compositor (aka. “noodle” – editing). A couple of weeks ago Nathan kissed the animation team goodbye and was transformed into a node-wrangler wizard. He is currently helping me to take the files from the animation- and environment department apart and assemble them back in compositing.
There are multiple reasons for utilizing a compositing pipeline that is integrated tightly into the rendering process:
- many scenes are way to complex to be rendered in one single pass (trees, leaves, bushes, grass, fur, feathers, huge textures, matte paintings)
- a rather annoying limitation of blender is that it does not handle motion blur and depth of field inside the rendering process very well, they have to be done in post. luckily blender has one of the most powerful 2D vector motion blur effects available, now with a new option to make curved motion blur (arcs are an essential tool in character animation)
- characters and scene elements often require individual color and effect treatments that go beyond lighting and exposure adjustments. after all, this is a cartoon!
- the anti-aliasing process is done after post-processing on ALL the rendering samples for extra crisp image quality (the new FSA option), also useful in masking and layer-seperation.
Here is a small step-by-step insight into this process:
the first step (often done parallel to lighting) is to seperate the individual elements of a shot into seperate RenderLayers: characters, foreground, background, etc.

the initial compositing setup is very basic, all elements are simply layered on top of each other using AlphaOver nodes. this can sometimes be very tricky if complicated masking / blending is involved.
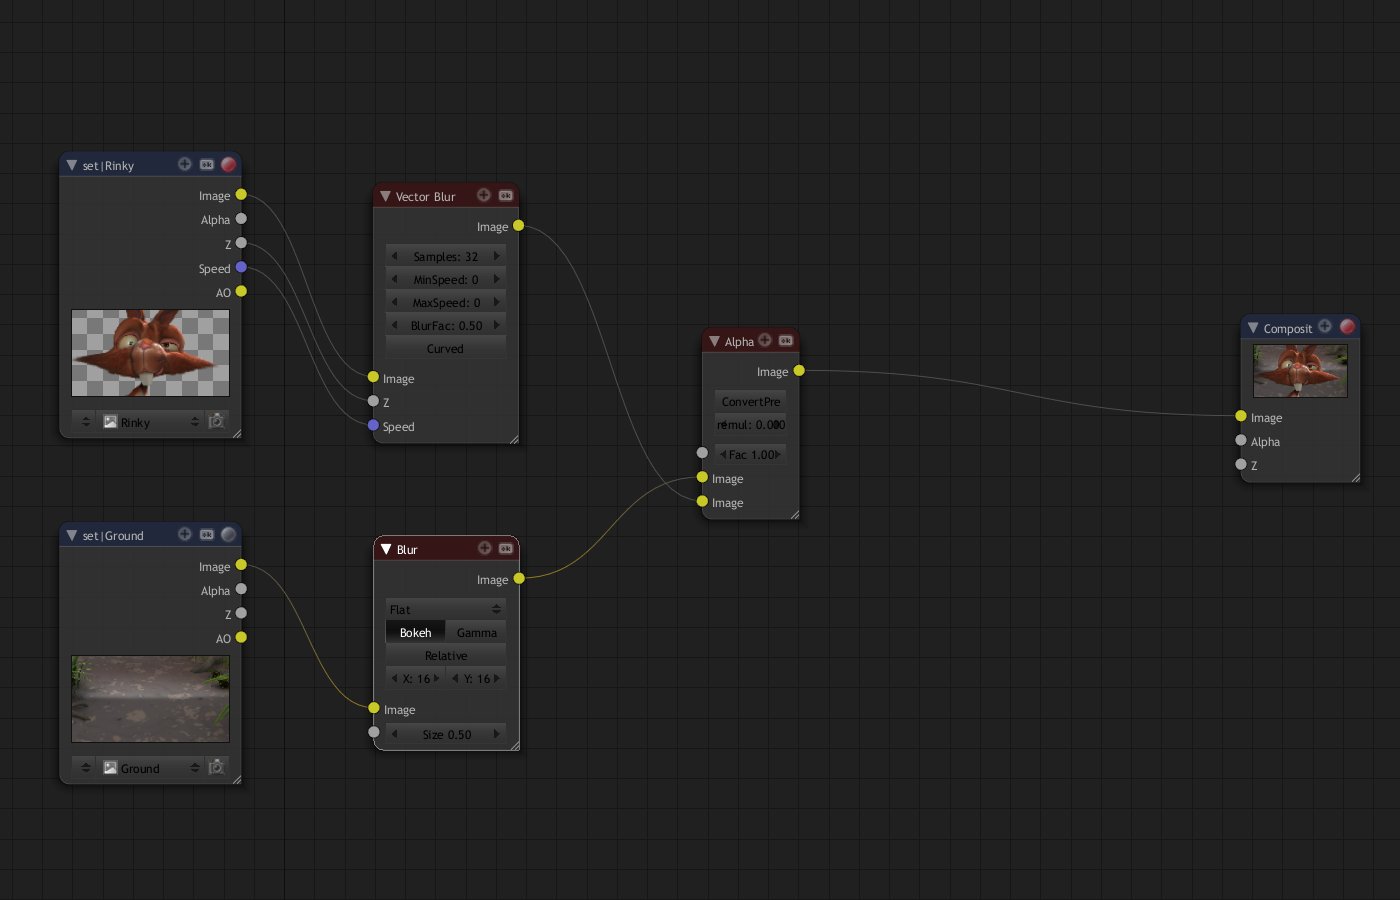
effects like depth of field and motion blur are added after that.
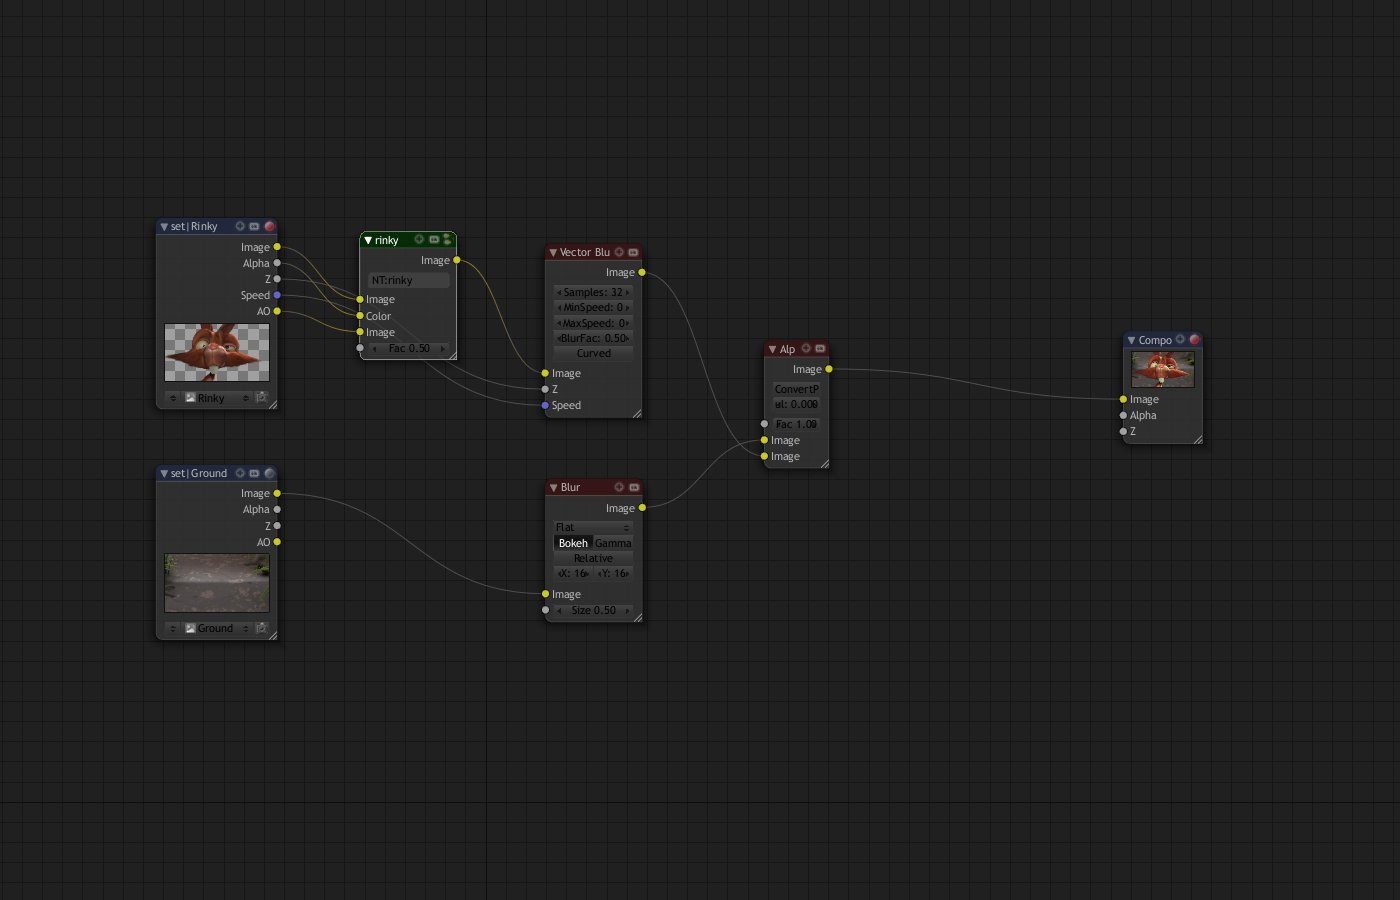
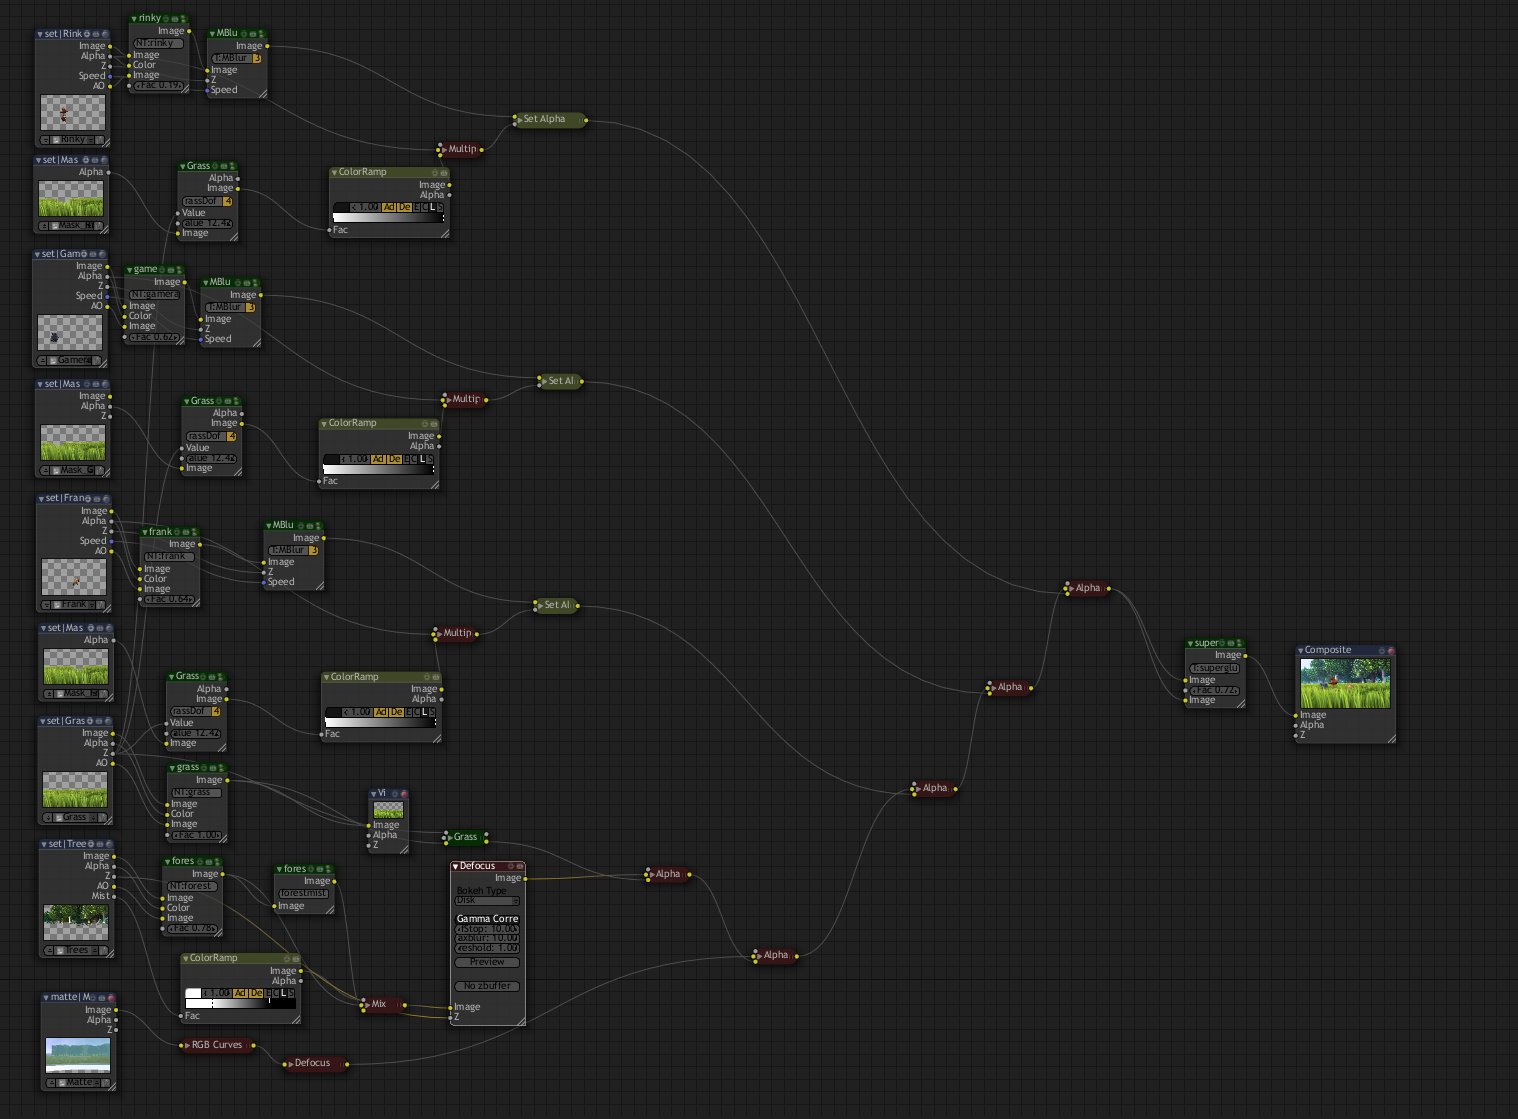
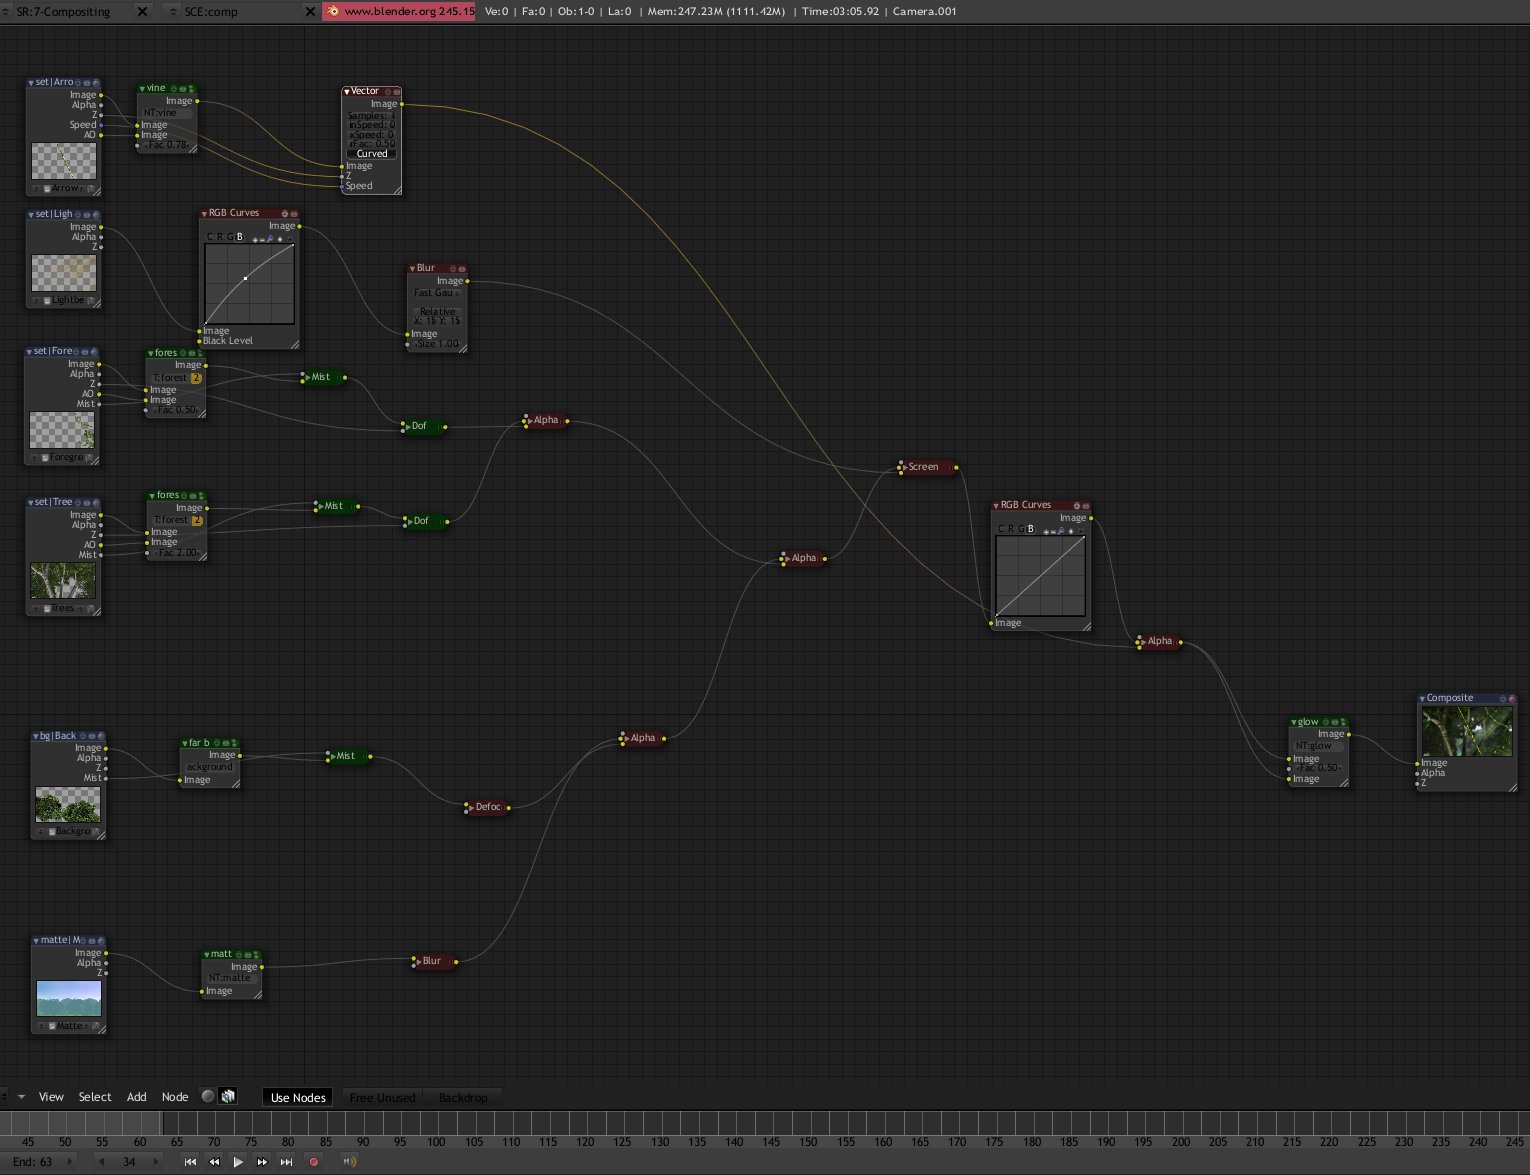
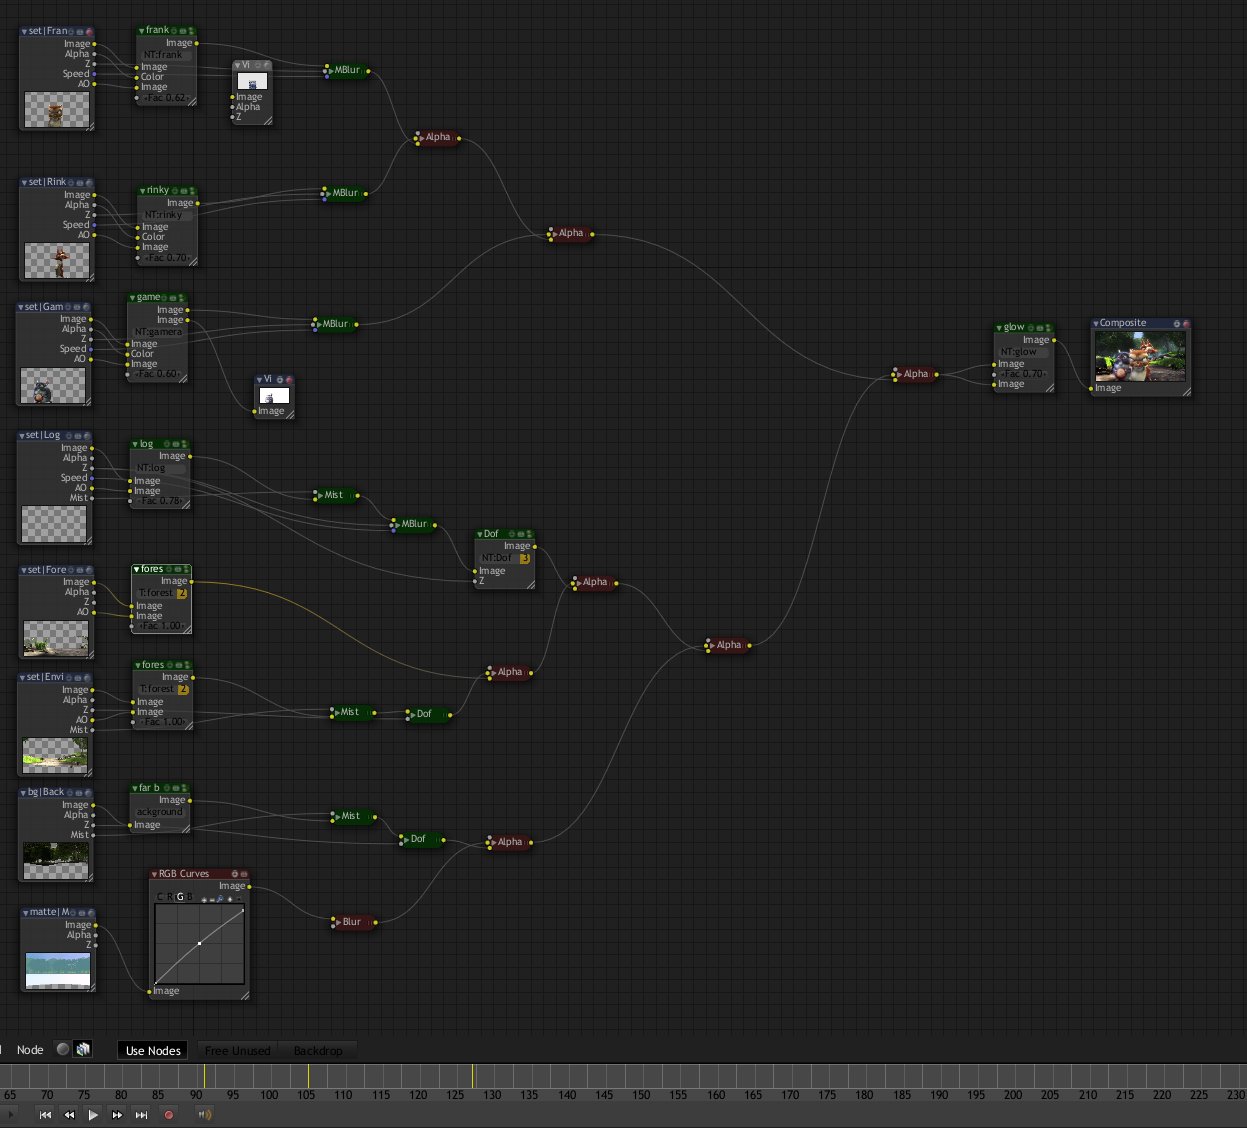
after that we can easily import our pre-made nodeTrees, these are very specific for each element / scene and often require further adjustments. this speeds up the compositing process quite significantly.
most of the time, the situation requires color correction to be done before (motion) blur, that benefit from the full high dynamic color range.
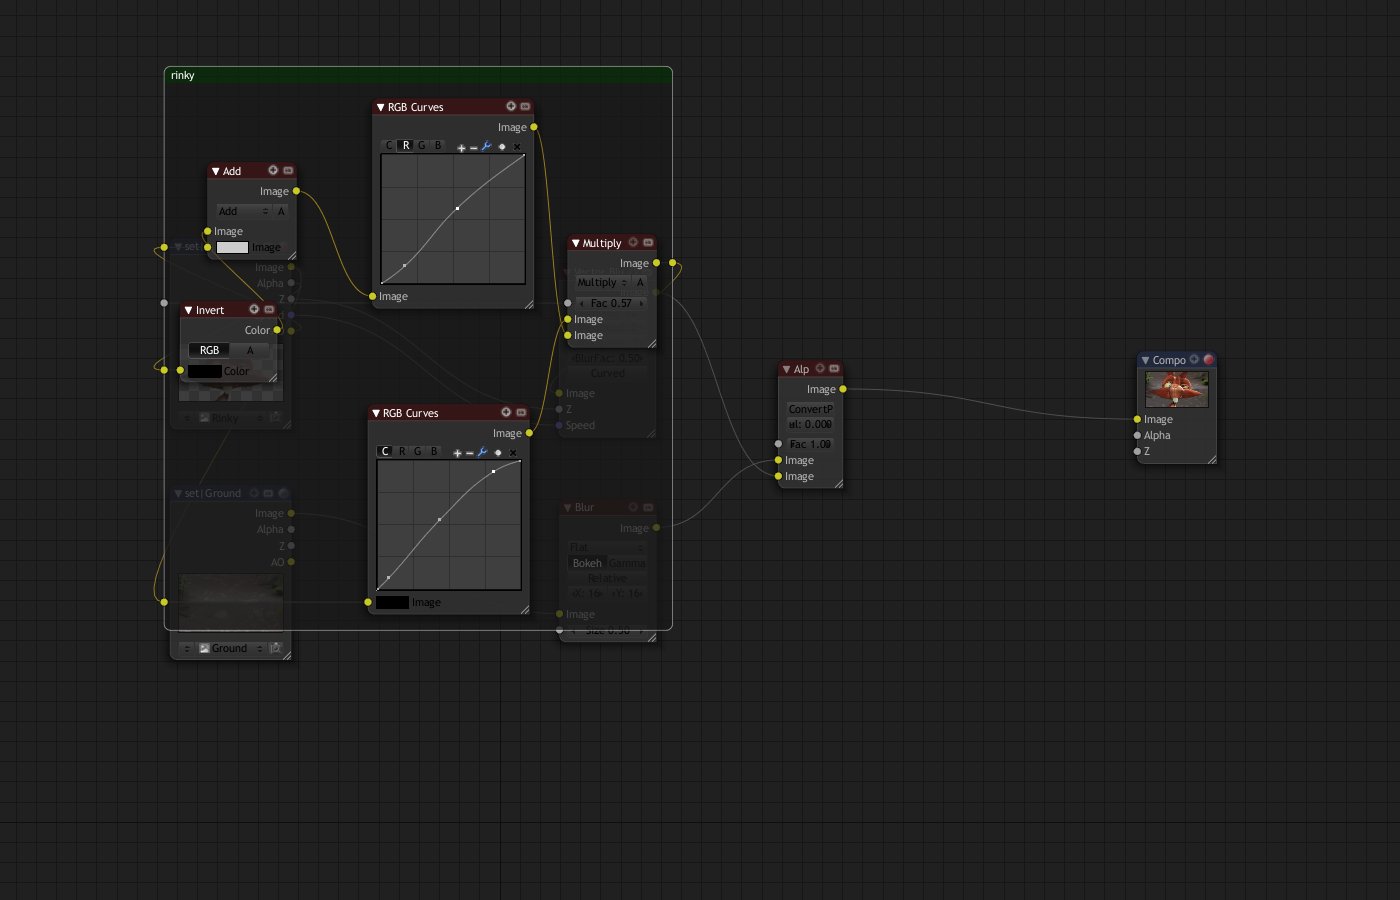
that’s an example for a character-specific nodeTree group: a separate ambient occlusion pass is multiplied on top of the rendered image. both inputs are color corrected individually for maximum artistic freedom.
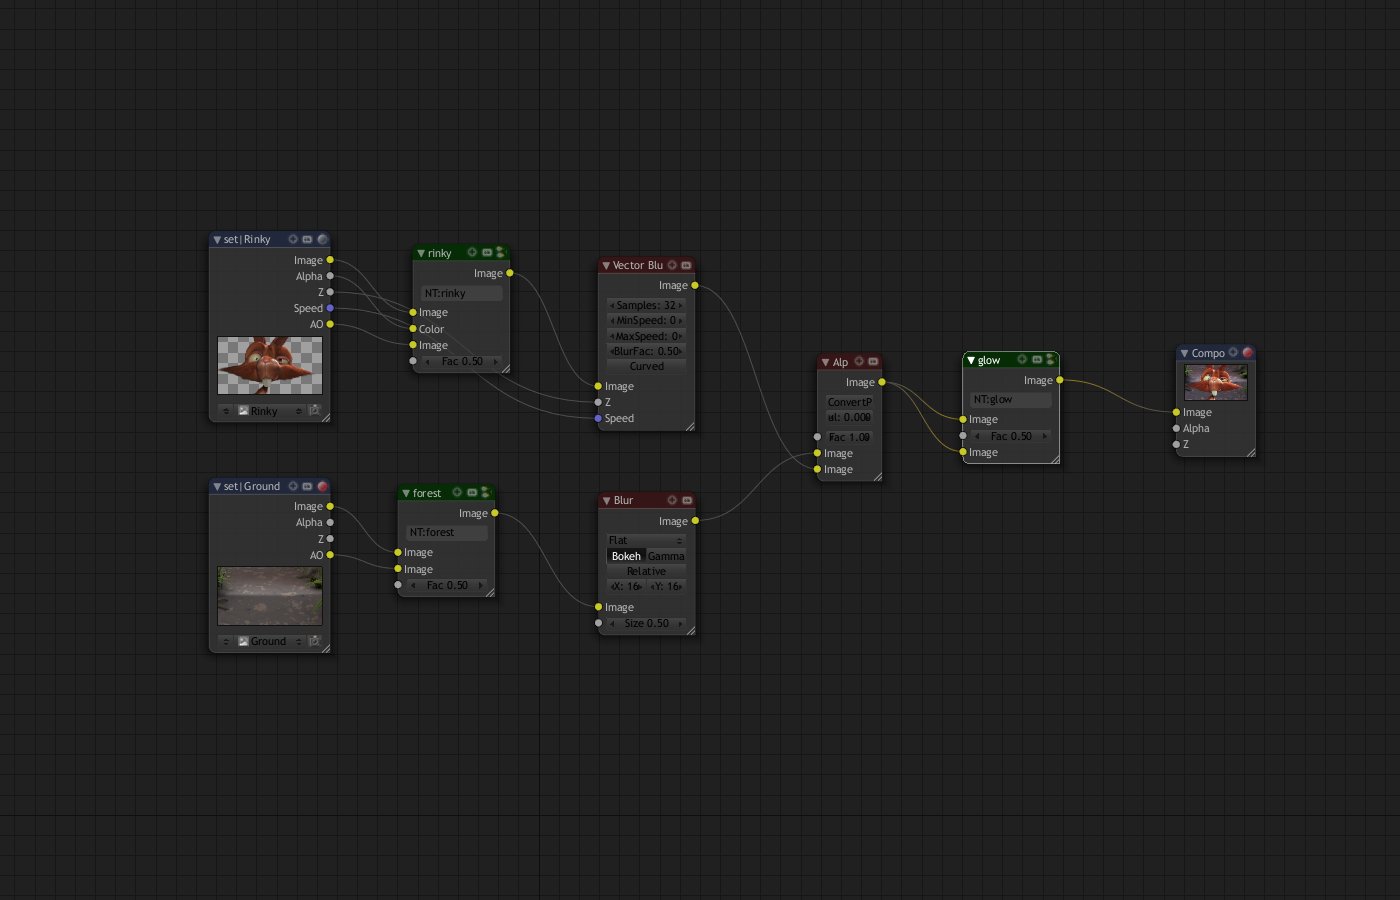
each render layer can have its own set of sub groups.
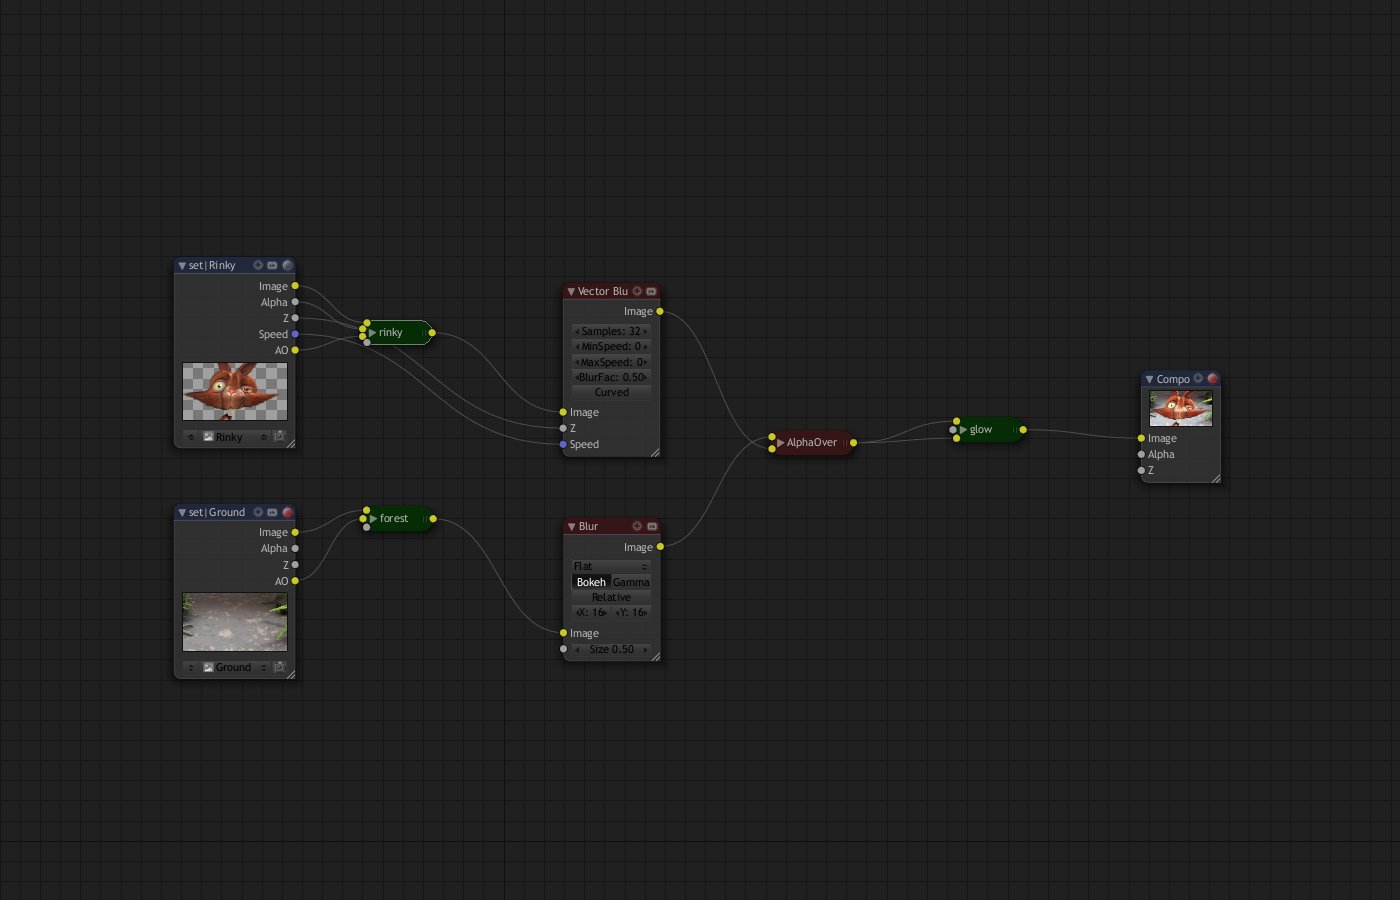
and that’s the final composite! a very simple shot like this can be composed together in a matter of minutes (rendering, setting up lights and tweaking stuff takes extra time of course). now this shot is ready for the render farm, NEXT!
A small but quite helpful detail for those who are familiar with the blender compo system: All the compositing setups are done in another blender scene, separate from the visual elements. This makes it very easy to append a setup from another shot for example. Different shot elements can also be separated into more than one blender scenes for better memory management. This way, memory can be flushed after each rendering pass to have more for the next. (activate “Save Buffers” and “Free Tex Images” in the Scene Buttons)
Since you can fill entire books with all the compo stuff (which will probably happen sooner or later), I can show you a small selection of our rather strange node setups instead:


back to work!
.andy
February 26th, 2008 at 5:58 pm
Good to see a quality blogpost by Andy again.
It’s about time!! :)
February 26th, 2008 at 6:01 pm
So one of the characters is called Rinky?!
February 26th, 2008 at 6:03 pm
wow, amazing work…keep it up!!!! :)
February 26th, 2008 at 6:19 pm
Andy,
Very good post. I am a node fanatic and love to see what you are doing with them!
Very good work!
February 26th, 2008 at 6:30 pm
Nice to look over the shoulders of a great artist :D.
Very good and interesting work. I really can’t wait to see the movie.
February 26th, 2008 at 6:31 pm
aha!! i knew those pretty screenshots were just for the blogpost! the ones at the end are more credible =)
good work Andy!
February 26th, 2008 at 6:36 pm
Sweet post! I use the Blender node system for advance comp. work; it’s great! Although, I do remember having to hit the E-key to refresh/reload my image sequences, as every time I loaded my blend file the viewer nodes won’t display my footage. Have any enhancements or bug fixes been addressed with the node system? For those wanting to learn node-based compositing, I recommend this video tutorial (http://www.blendedplanet.com/?Freebie_Tutorials:Color_Difference_Key) by David Weese.
February 26th, 2008 at 6:39 pm
well, now for a really unneeded question: cool interface theme! Is that for 2.46 ?
Great article, and very much looking to the content on the dvd explaining all this wonderful stuff ;)
February 26th, 2008 at 6:41 pm
Маловато будет!
February 26th, 2008 at 6:42 pm
Well said!
I suppose the glow node is the final
touch for the composite in noodles5 because of the border you can get from
AlphaOver?
February 26th, 2008 at 7:56 pm
Whew! This is awsome! I love seeing this post production stuff! Bookmarked for further study!
February 26th, 2008 at 8:31 pm
So, this curved motion blur… what do you mean exactly? I would like to interpret it to mean that if an object moves on a curved path between two frames then the resulting blur will have that curve rather than linear interpolation between the current frame and previous frame positions. But I don’t see how that would work without making the ‘Vec’ output from the renderer into the compositor an array of samples between the two frames. Have you done this or is it something less awesome?
February 26th, 2008 at 9:25 pm
Отличный пост!
February 26th, 2008 at 9:39 pm
Looks great!
February 26th, 2008 at 10:02 pm
Lethe, the vector pass is still the same, it takes the 3 points and fits a Bézier curve passing through them.
February 26th, 2008 at 10:45 pm
noddles are the best :D
just a question…what is that theme you use on the blender interface ??
/wp-content/uploads/screenshot3.jpg
is this the skin for Blender 2.5 or can we have it as a theme for blender 2.45??
February 26th, 2008 at 11:02 pm
This looks really great! Super progress! Good luck to all your finishing works. Has been the D day decided already?
February 26th, 2008 at 11:23 pm
As Gianmichele said that interface theme is very cool! If its not 2.46 can you post the exported “.py” of the configuration of the theme? :P
And great work on the movie. Congratulations.
February 26th, 2008 at 11:55 pm
Excellent post production.
February 27th, 2008 at 12:27 am
Keep it up :)
February 27th, 2008 at 12:51 am
men keep it up , i want to see it finished ! it seems its going to be a very funny , and cool looking short film.
8D
February 27th, 2008 at 4:24 am
I didn’t know that it was possible to theme the Node Editor that much! How do you do it?
February 27th, 2008 at 4:37 am
Err, on an unrelated note, what happened to blenderartists? Its gone! Can anyone else confirm this or know why it is gone and when it might be up again?
Sorry for asking here, but I have no where else to ask, and I’m really worried. :(
February 27th, 2008 at 5:31 am
Wow, nice new header. Great blog post too.
February 27th, 2008 at 12:12 pm
Noodles, the diet of kings…. and people working really hard.
Keep it up guys, then you can relax and sauna all you want.
February 27th, 2008 at 1:05 pm
Renderfarms, noodles and Peach all from Amsterdam!!!! This needs more publicity!!! I’m really impressed. Can we find this info and how to use, also on the Peach CD (also more info about render farms)? Maybe nice to write a book about it BLENDER MOVIE ESSENTIALS, where can I pre order the book???
February 27th, 2008 at 2:15 pm
any chance we can get a hi-res of the peach andy?
February 27th, 2008 at 2:43 pm
Looking pretty awesome! I can’t wait to see it finished!
Ditto what Wayne said. Any hi-res of the peach?
February 27th, 2008 at 8:35 pm
Go go go Peach team!
February 27th, 2008 at 9:46 pm
w000000w … really great! I love blender!
keep working!
February 27th, 2008 at 9:54 pm
Absolutely amazing!
February 28th, 2008 at 7:34 pm
andy — when you say that some things are too complex to render in a single pass, are you talking about “use too much memory” or just “it’s too hard to sort out the visuals”. In those cases, are you splitting the things that are two complex into fully separate Scenes? This kind of gives the impression that simply splitting things into renderlayers on the same scene helps with that.
February 28th, 2008 at 7:53 pm
:) You first do the composite and only then send te scene to the render farm…
In my previus project I rendered all indevidual layers to OpenEXR images and only then composed them :/
One irrelevante question; just in case you have some compositor Blank and have some free time to anwser, else never miend ;)
Using the old Blender pre-ver. 2.45 what do you consider better, do the composite first or after render!?
Anyway, with the new OSA I guess that now I’ll need to do always the composite First :P
February 29th, 2008 at 2:43 pm
Kids tell me – bugger the tech spec, hurry up with the deadline! :)
March 2nd, 2008 at 4:44 pm
Nice work, and a really nice skin you have there! =P
March 3rd, 2008 at 2:55 pm
I see some of these renders in the Header and I was thinking. Why not do full renders
of the environments and such and post some pictures in the gallery instead of the same
old characters we’ve seen 100 times! :P
March 3rd, 2008 at 3:26 pm
@Anthoni_C : because, rightly, they don’t want to give away too much, and I agree with them. Patience guys, this is going to be soo awesome and it’s almost finished.
March 4th, 2008 at 1:37 am
Hi people,
whats the Deadline date? Is it, end of March ?
Where can we find info about it ?
Thanks
March 6th, 2008 at 7:37 pm
Can anyone give me tips for a place to get started on nodes? I don’t quite understand how to use them effectively.
Thanks
March 6th, 2008 at 8:06 pm
Wow, those node setups are considerably more complicated than I have ever used!
NathanKP – The Writings of NathanKP
March 18th, 2008 at 3:19 am
I posted the following in another thread…
It seems like modeling and animation nodes would work together pretty well. The way I thought of to do this is make every tool a node(i.e. extrude, sub-divide faces, etc.). By doing this you would create a construction history, allow developers to easily create new tools simply by creating new nodes, and easily integrate animation and logic right into the node/construction history. If you have any questions, email me at [email protected].